Posted by
sf-admin onLast Updated 14th June 2020 at 12:05 am
It’s the build-up to your long-awaited family ski holiday! The equipment is bought, you’re frantically checking the weather forecast every day and your kids won’t stop nagging you with ski questions! Then a family member harmlessly asks how your ski fitness is. You go for the occasional jog, you think, but it’s a family holiday, right? You don’t need to be an athlete to ski, right?
Of course! We’re not here to scare you into thinking that skiing is only for the elite. There are plenty of families who go skiing without training and have the best holiday of their lives. Having said that, to get the most out of your family ski holiday a little bit of preparation to condition your body to ski can go a long way. A reasonable level of fitness will help you to sustain your energy throughout your week and lower your risk of injury.
It may be hard to believe that the thrills and adrenaline that skiing offers goes hand in hand with the far more relaxing activity of yoga. Both skiing and yoga share similar aspects of fitness such as core strength, balance and flexibility. If you’re not one for yoga then getting your kids involved alongside you can give you just that little boost to get started.
If you have any health problems, injuries or are simply unsure whether the below exercises are appropriate for you, then please consult a doctor before participating.
Chair Pose
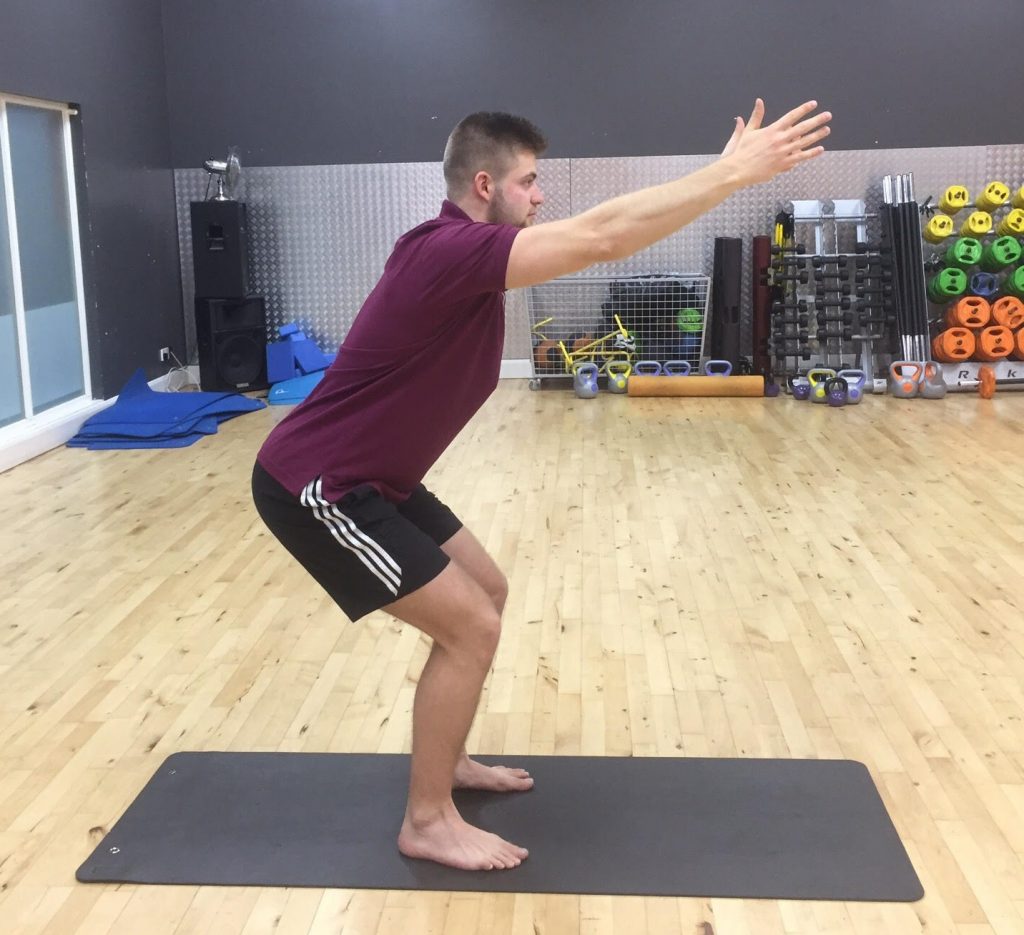
Skiing is like one big Chair pose down the mountain. The average person on a family skiing holiday will ski for 4 to 6 hours a day – that is 4 to 6 hours of doing the Chair pose (excluding all of the hot chocolate breaks of course!)
- Stand with your feet hip distance apart.
- Inhale and raise your arms above your head with your palms facing each other.
- Sit back and exhale as if you were sitting on a chair while gazing forwards and keeping your neck lengthened.
Our Advice:
- Keep your inner thighs parallel.
- Tuck your buttocks in so that your tailbone points towards your heels.
- Picture your lower back as a downward slope rather than a ski jump.
Downward Dog
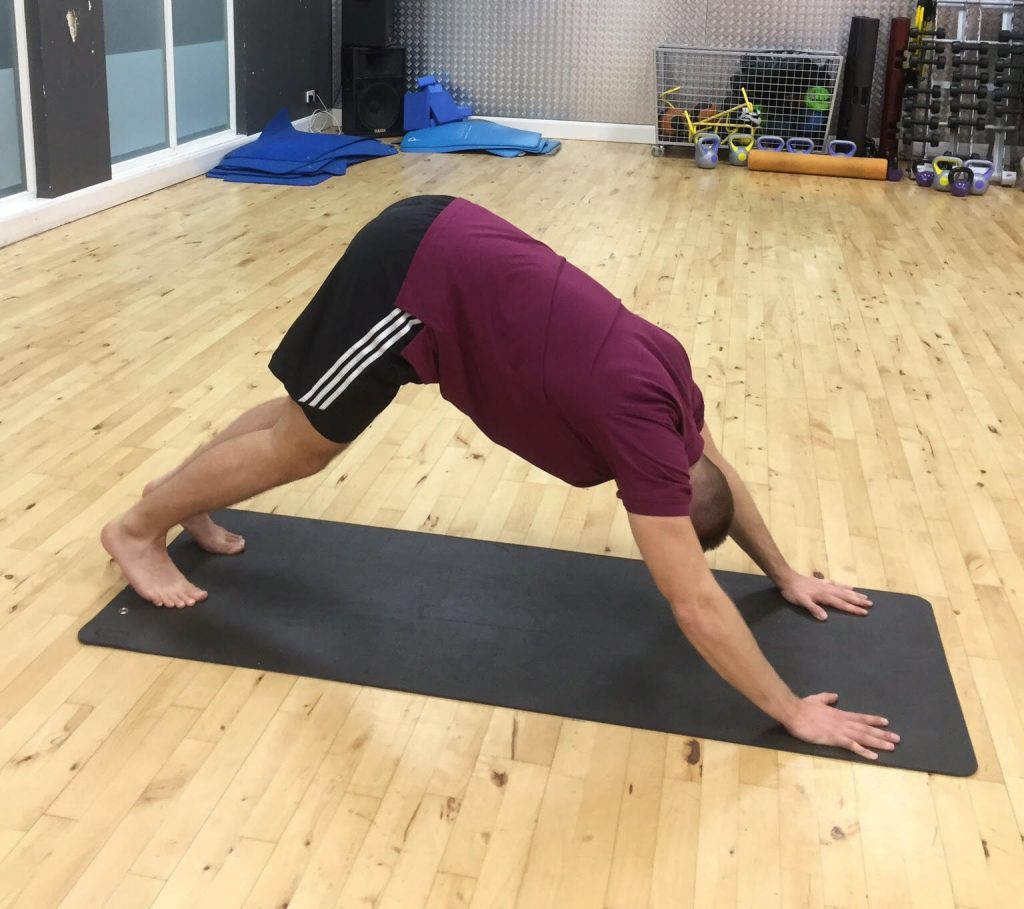
This pose is great for stretching the whole body – in particular the calves which are constantly used throughout a day skiing.
- Place your hands and feet on the floor and raise your glutes (bum) while bending your knees slightly and keeping your arms straight. Your body should be in an upside-down V position.
- Push through your heels and feel a stretch deep into your calves.
Our Advice:
- Lifting your glutes a little higher will shift more of a stretch on your calves and hamstring muscles.
Crescent Lunge
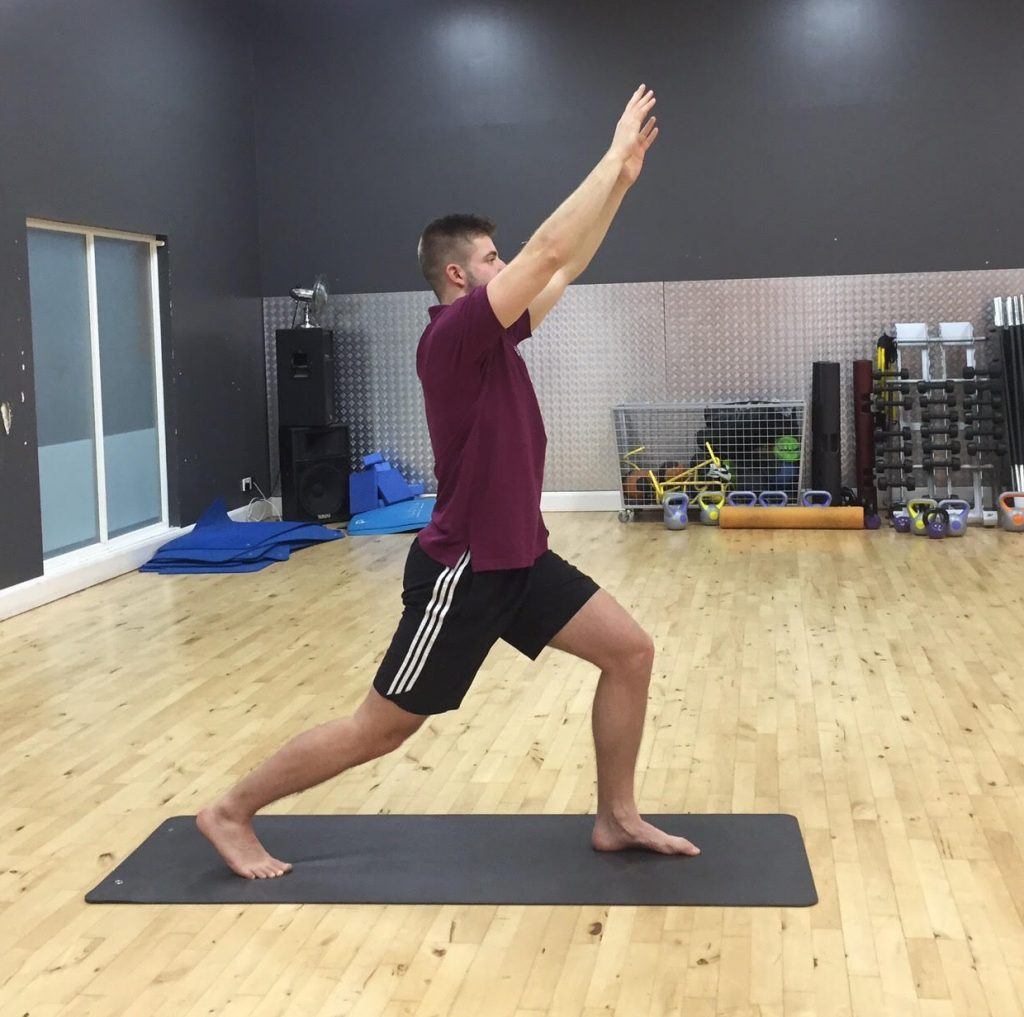
This pose strengthens your feet, ankles, knees, and thighs which is important when skiing or simply standing in ski boots for a long period of time.
- After completing Downward Dog, exhale and bring your right leg back about 4 feet and drop your right knee so that it touches the ground.
- Your left leg should be slightly bent with your left knee directly above your left ankle.
- Inhale so that your body is upright and sweep your arms wide to the sides, then raise them over your head with your palms facing each other.
- Hold for 30 seconds, then have a go with your other leg!
Tree Pose
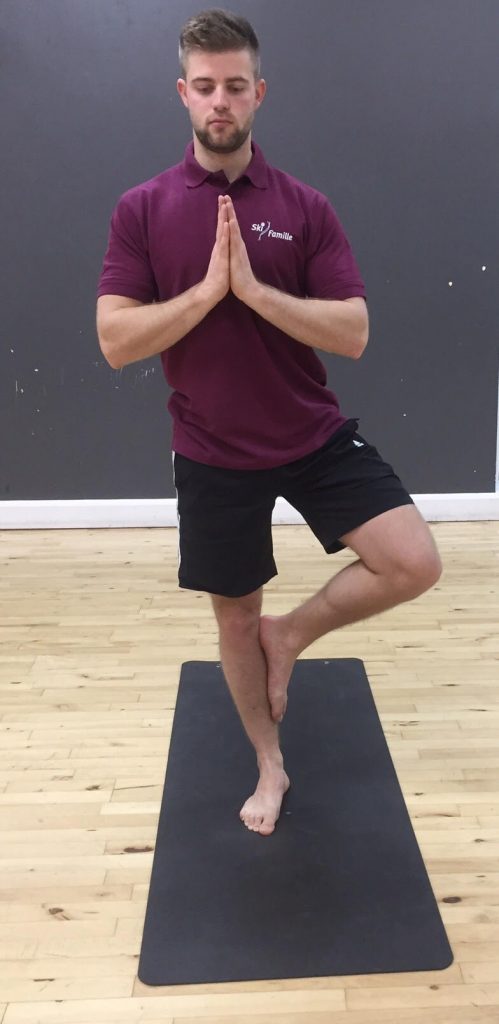
For anyone who has skied before, you may have experienced the feeling of ‘zoning out’ (or simply daydreaming!) This pose will help you to retain focus and concentration after a long day in the beautiful mountains. It’ll also improve balance and coordination; both of which are essential in skiing.
- Start with your feet together and hands by your sides with your weight evenly spread across each foot.
- Transfer your weight to your left foot. Bend your right knee and place it on your calf.
- Bring your hands to your chest and press your palms together in a prayer position.
- Hold for 30 seconds and then switch to your other leg.
Our Advice:
- If you are wobbling, gaze on one particular spot in front of you to maintain balance.
- Ensure your ankle, knee and hips are all straight and aligned on your resting leg.
- Ensure your left and right hip are level with one another.
- If this pose is too easy, move your foot off your calf and place it above your knee.
Warrior III
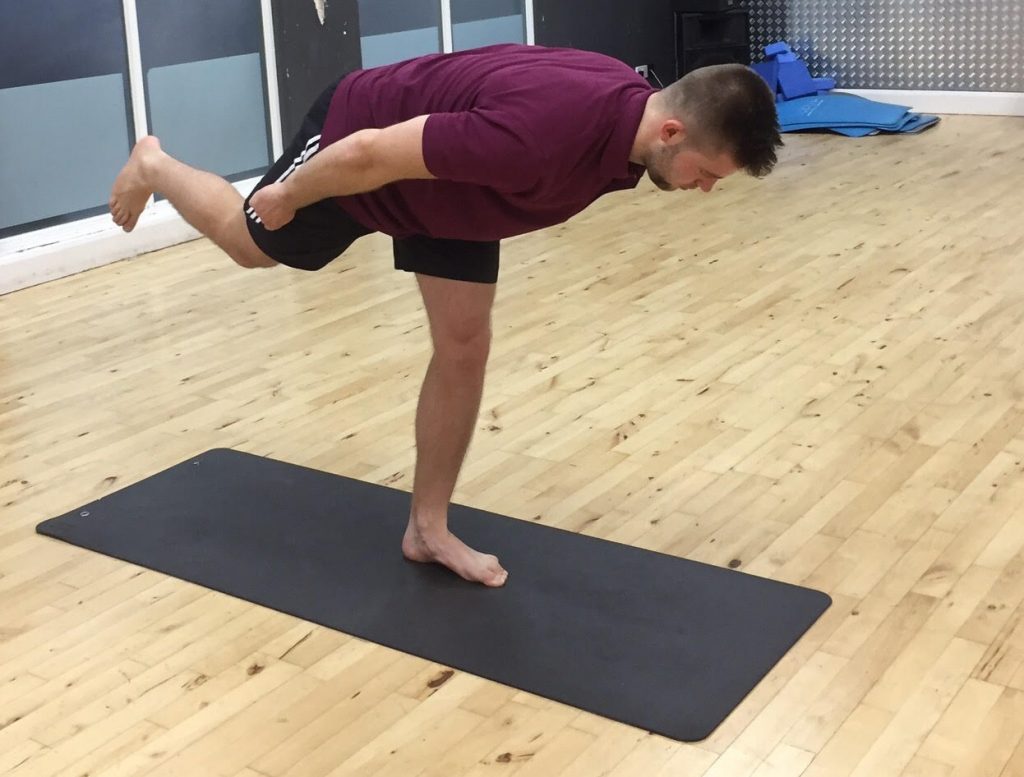
This pose incorporates balance while working pretty much every muscle in your body – in particular your core, glutes (bum) and legs.
- Start with your feet hip distance apart, hands by your side and your body weight evenly distributed between each leg.
- Inhale and bring your arms over your head.
- Extend your right leg behind you while exhaling and keeping this right leg straight.
- Ensure your right foot is flexed with your toes pointing down towards your mat, and find a strong line of energy all of the way along your right leg up to your right heel.
- Bring your torso as parallel to the floor as you can manage. Ensure you keep your core muscles tight and “suck in” your belly to provide more stability to your upper body.
- Keep the back of your neck flat and relaxed.
- Hold the pose for 5-10 seconds and then attempt this again on the other leg.
Our Advice:
- If you’re struggling to balance yourself, ensure you aren’t leaning too far forwards.
- Focus your gaze on a particular spot on the ground.
Twisted Chair
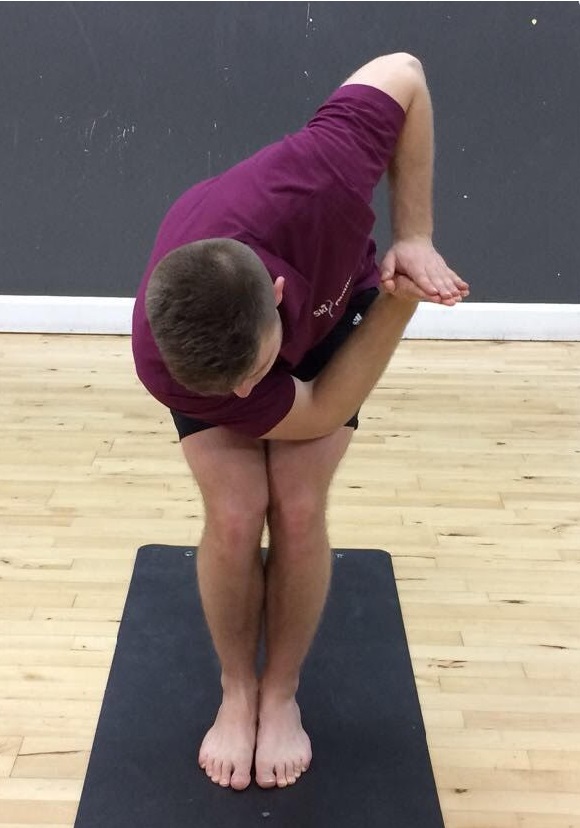
- Start with your feet together and hands by your sides with your weight evenly spread across each foot.
- Inhale and bring both of your arms straight above your head.
- Exhale and simultaneously lower your buttocks and bend your knees so that your thighs are as close to parallel to the floor as you can manage.
- Twist your torso to the right and place your left elbow on your right knee. Turn your gaze as you do this so you are looking upwards. Bring your hands to your heart and press the palms together in a prayer position.
- Hold for 30 seconds to a minute.
Our Advice:
- Do not twist as far if you are finding this pose challenging. If you’re finding it too easy, try twisting a bit further!
- Focus your gaze on particular spot.
Camel Pose
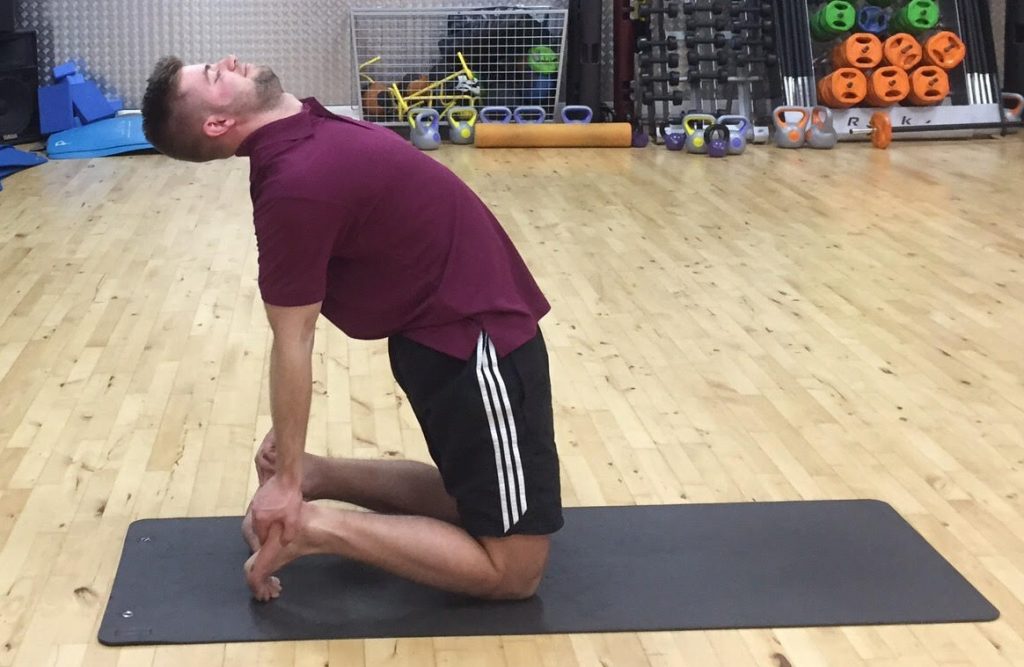
This pose helps open up the chest and therefore helps your lungs in high-altitude.
- Kneel on the floor with your knees hip width apart and toes tucked under. Tuck your chin in and lengthen your tailbone towards the floor.
- If you feel comfortable doing so, reach back with both hands and grab your heels so that your fingers are pointing downwards to the floor.
Our Advice:
- If you cannot reach your heels, grab as close to your heels as you can possibly reach.

